Working interlace patterns is always a challenge to me. It is difficult for me to see the relationships between the pieces. What follows is one way to look at understanding Interlace Patterns.
THE ONE Absolute: The pieces always work over then under or under then over. You never have 2 overs or 2 unders as you weave your way through the pattern.
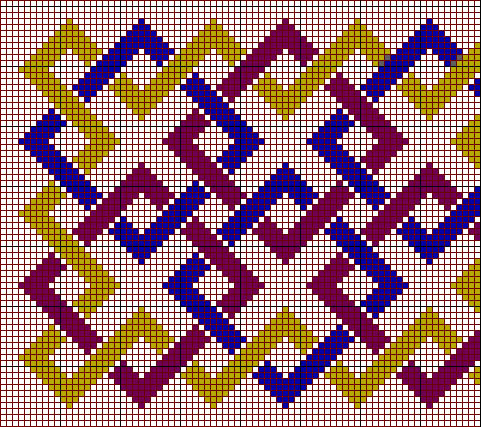
Step One: Draw in one of the sets of 3 squares in the same color, either the blue or purple. They do not overlap in any manner.
Step Two: Draw in the other set of 3 squares. They overlap the prior set such that their corners would normally cover up part of the other set of squares. Instead a pattern is worked out so that as you follow around each square one line is laid either over or under the other. Starting at the top left square, top point the pattern is: over, under, over, under. Starting at the next square to the right, top point the pattern is: over, under, over, under, over, under. It is important that you remember the pattern is you want to lengthen the band. On the lower set of squares the pattern is REVERSED - under, over, under, over
Step Three: Now draw in the outer border. Its inner points face the points of the squares inside the border. Its outer points are directly between the squares outer points. At the corners the border turns in some form of "U" to connect the sides. Now to establish its pattern - start at the upper left corner - under and over the first square, under and over the next square - and continue around the border.
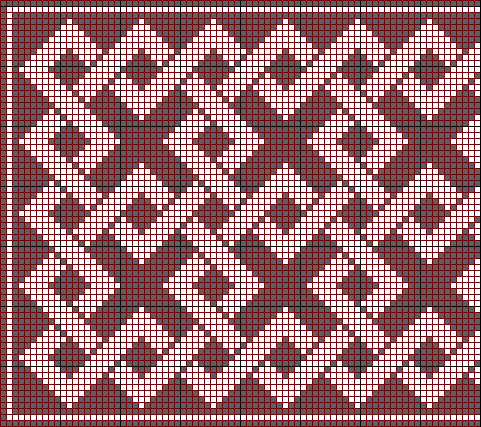
Now look at the uncolored version of the interlace band and see if you still see the pattern.
Return to the Main Page for Bayrose.org
All Rights to Pictures and Text Reserved by Robin L. Berry, unless noted otherwise - 2007.